Hot

This tutorial was written for those
that have a working knowledge of PSP.
Supplies Needed:
PSP 9 (any version will work)
Tube of choice
I used artwork by Keith Garvey you will need to use about 5 tubes of the same artist
If you would like to use his artwork please visit PSP Tubes Emporium
#
I bought this when Garv was still at MPT
Tag template #106 by me which you can download from my blog here
Mask by Vix thanks hun!!
Font of choice - I am using 'Waterbrush Rob'
Pattern fills
Supplies here
Let's get started
Open up my tag template CTRL & D to duplicate it
Close off the original
Image canvas size-change the width and height to 700 x 700
Select the wordart template layer-now using the magic wand-click inside the letter H to select it
Choose a tube for the H-copy and paste this onto your canvas-arrange over the letter H
Selections-invert-hit delete-selections-select none to deselect
Repeat the above for the remaining letters-using different tubes
Select the wordart template layer again-selections-select all-float-defloat
Selections-modify-expand by 2. 00-new raster layer-flood fill the letters with #f57ca7 and #000000
See tag above-select none-now move the flood filled layer below the tube layers
Add drop shadow to this layer 5, 5, 60, 12.83, black
Select the rectangle 3 layer-selections-select all-float-defloat-new raster layer
Flood fill this layer with white-do not deselect yet-new raster layer-open up the pattern fill 3 supplied-on your pallette select pattern
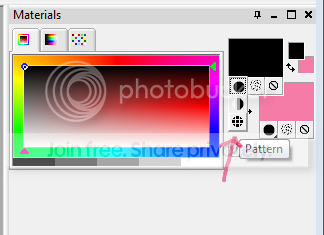
Then look for the pattern fill 3

Click ok-then flood fill the selected area with this pattern-selections-select none
Lower the opacity of the pattern to around 38
Add drop shadow to the white rectangle layer 0, 0, 60, 12.83, black
Select the rectangle 2 layer-selections-select all-float-defloat-new raster layer
Flood fill this with pattern fill1-selections-select none-drop shadow as above
Repeat the above for the rectangle 1 layer but flood fill with the pattern fill 2
Drop shadow as above
Copy and paste your main tube-arrange to the left of your tag
Drop shadow 5, 5,, 60, 12.83, black
Open up Vix's mask-new canvas 550 x 550
Flood fill with #f57ca7-layers-new mask layer-from image
Look for Vix_Mask147-make sure invert mask data is unticked-click ok
Merge group-copy and paste this onto your tag
Move this layer above the white background-arrange more the the right of your tag
Using a font of choice-I am using 'Waterbrush Rob'- add your name to your tag
I placed the name in the center of the tag but this is upto you
Crop and resize if needed
Add proper copyright info then save as .png
Thanks for trying my tutorial. I hope you have enjoyed it
This tutorial was written on 4th January 2009.
The concept of the tutorial is copyrighted.
Feel free to link to the tutorial and or print out for your personal use.
But please do not copy it in any way to put online, pass out, or rewrite without permission.
The image you create using this tutorial is for you do to as you wish except for monetary gain or for merchandising.
©Just T!ckled P!nk 2007-2011. Any resemblance to another tutorial is purely coincidental.
Proud member of TWI

Subscribe to:
Post Comments (Atom)
-♥-My TOU-♥-
All of my tutorials are copyrighted.
Feel free to link to the tutorial in your groups and or print out for your personal use.
But please do not copy it in any way to put online, pass out, or rewrite without permission.
The image you create using this tutorial is for you do to as you wish except for monetary gain or for merchandising. However, just because you did my tutorials that does not give you the right to go and tut your results. Unfortunately that has happened to me. Tut writers please do not use my exact settings in your tutorials please make up your own :)
By staying on my blog and doing my tutorials you are agreeing to my TOU.
©Just T!ckled P!nk 2007-2011. Any resemblance to another tutorial is purely coincidental.

0 comments:
Post a Comment