Creative Misfits

This tutorial was written for those
that have a working knowledge of PSP.
Supplies Needed:
PSP 9 (any version will work)
Tube and close up of choice
I used artwork by Ismael Rac
If you would like to use his artwork please visit his store here
I bought this tube when Ismael was at AMI
Template by me please do not use in any other tutorials unless I decide to put this on my blog
Font of choice - I am using Radius & Water Brush Rob
Filters used
Eye Candy 4000 - Gradient glow
Supplies here
This is a real quick tutorial
Lets get started
Open up my template supplied
Image-canvas size-change the width and height to 700 x 700
Select the Misfits layer-selections-select all-float-defloat
Open up your close up layer of choice
Copy and paste onto your canvas-arrange over the letter M
Selections-invert-hit delete
Paste the close up again-arrange over the rest of the letters
Hit delete-repeat again if anymore of the letter needs covering with the close up
Selections-select none
Close off all the layers all except the close ups we just added
Merge visible-reopen the layers
Duplicate the close up parts-adjust-blur-gaussian blur-radius 3.00
As always change the blend mode to soft light-lower the opacity to around 36
Select the original close up part layer-change the blend mode to luminance (L)
Lower the opaciy to around 36 again
Select the duplicated close up layer-effects-plugins-penta.com-color dot
Use the following settings
Copy and paste your tube of choice-arrange this as above so it is like the I in Misfits
Duplicate-adjust-blur-gaussian blur-radius 3.00
Change the blend mode to soft light
On the original layer-add drop shadow off 0, 0, 40, 10.26 black
Using a font of choice-I am using Radius-add the word Creative or what ever you like
Rotate left by 90-arrange this to the left of your tag-convert to raster
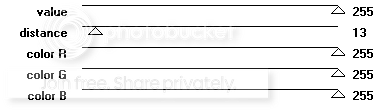
Adjust-add/remove noise-add noise-use these settings

Effects-plugins-eye candy 4000-gradient glow-use following settings


Add a star next to the word Creative if you wish
Using a pixel font of choice-I am using FFF Urban-size 6
Add the words Where Creativity Rocks or anything else of choice
Crop and resize your tag if needed-add proper copyright info then save your tag as .png
Thanks for trying my tutorial. I hope you have enjoyed it.
This tutorial was written on 24th August 2009.
The concept of the tutorial is copyrighted.
Feel free to link to the tutorial and or print out for your personal use.
But please do not copy it in any way to put online, pass out, or rewrite without permission.
The image you create using this tutorial is for you do to as you wish except for monetary gain or for merchandising.
©Just T!ckled P!nk 2007-2011. Any resemblance to another tutorial is purely coincidental.
Proud member of TWI

Subscribe to:
Post Comments (Atom)
-♥-My TOU-♥-
All of my tutorials are copyrighted.
Feel free to link to the tutorial in your groups and or print out for your personal use.
But please do not copy it in any way to put online, pass out, or rewrite without permission.
The image you create using this tutorial is for you do to as you wish except for monetary gain or for merchandising. However, just because you did my tutorials that does not give you the right to go and tut your results. Unfortunately that has happened to me. Tut writers please do not use my exact settings in your tutorials please make up your own :)
By staying on my blog and doing my tutorials you are agreeing to my TOU.
©Just T!ckled P!nk 2007-2011. Any resemblance to another tutorial is purely coincidental.

0 comments:
Post a Comment